

Aqueous washing removes oil, chips, dust, and process residue, but the part normally leaves the final rinse wet. Machine vision needs a different condition: the surface, position, and lighting response must remain stable long enough for the inspection tool to make the same decision on every good part.
The Air Knife sits between those two requirements. It removes free rinse water, pushes droplets out of accessible features, and helps create a repeatable surface before the camera trigger. It also separates the wet washer enclosure from the optical inspection area when runoff and mist are properly captured.
The washer endpoint is contaminant removal and rinse quality. The vision endpoint is image stability. A part can pass washing but remain unsuitable for imaging because a droplet changes reflection, a film lowers contrast, or water moves during exposure.
Vision lighting is selected around the dry surface and target feature. Bright-field, dark-field, diffuse, coaxial, and backlight arrangements create different contrast. A changing water layer therefore changes the optical object presented to the camera.
Specify the handoff: correct rinse chemistry, limited free liquid, a stable part, and an environment that does not coat the lens or light window.
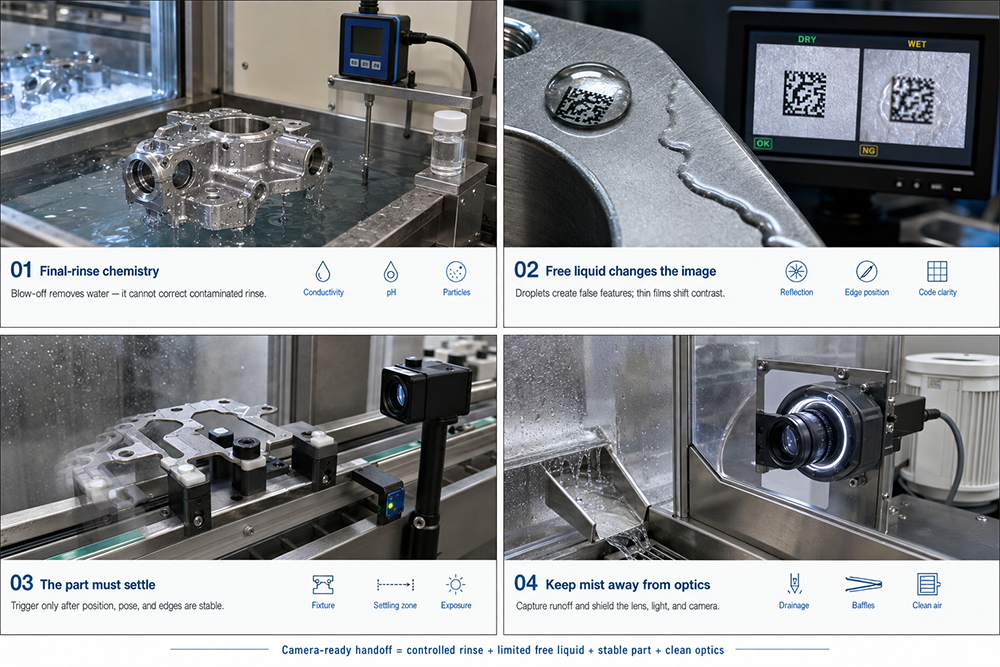
The air knife should normally work after the final rinse, not directly after the detergent wash as a substitute for rinsing. If cleaner remains on the surface, blowing and drying can concentrate non-volatile material into a film or edge mark. That film may change gloss, brightness, color, or apparent defect shape.
Multi-stage aqueous washers separate wash, rinse, final rinse, and drying functions for this reason. Air curtains or intermediate knives can reduce chemistry transfer between stages, but the camera-ready blow-off belongs after the final liquid contact that meets the process requirement.
Monitor final-rinse condition with the measures relevant to the part, such as conductivity, resistivity, pH, particles, or change frequency. The air knife can remove final-rinse water; it cannot distinguish clean water from contaminated water once both are on the component.
A droplet can appear as a bright ring, dark spot, highlight, or distorted local image depending on lighting and surface finish. It may cover a code module, shift an edge, or resemble a pit. Because the droplet can move, two images of the same part may not match.
A continuous wet film can alter specular and diffuse reflection over a broad region. This matters on polished metal, glass, coated components, and molded surfaces. The vision recipe may be stable on a dry reference but drift when film thickness varies from part to part.
Rinse water can move dissolved or suspended material toward an edge, pocket, or contact point. When water remains, the camera may see both the droplet and the material it carries. Proper rinsing removes chemistry; the air knife limits where final-rinse water can collect and dry.
Airflow applies force. Thin stampings can flutter, small components can shift, and hanging parts can swing. Imaging during motion may blur edges or change pose. More airflow is not automatically better.
Trigger downstream of a settling zone. Set its length from conveyor speed, part stiffness, fixture, air force, and exposure. Confirm position and edge stability at the fastest approved speed.
The fixture must hold the part without trapping water. Contact pads, rails, and pockets can release droplets after the surface looks dry, so include them in the test.
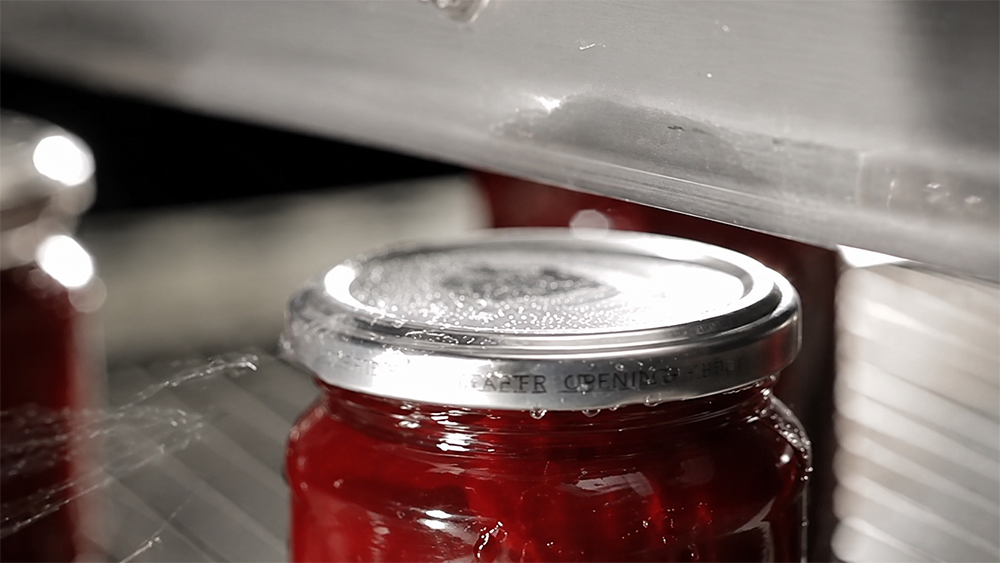
A high-velocity jet removes water from the part, but that water must go somewhere. Without a drain, guard, or extraction path, droplets become mist and travel toward the camera. A clean first image does not prove the layout is sound; the lens window may become coated during an extended run.
Aim runoff toward a controlled drain and keep the camera outside the direct plume. Use baffles that shed water rather than horizontal surfaces that collect it. If an enclosure separates washing from inspection, manage its airflow so humid air does not condense on the light or window.
Blow-off air can also recontaminate the surface. Use clean, oil-free, filtered air where oil, water, or particles from the blower, duct, or plant air could affect inspection. Keep blower inlets away from washer vapor, floor dust, and dirty enclosure exhaust.
The sequence is deliberate: wash removes contamination, rinsing removes chemistry, the final rinse sets the last liquid condition, and the air knife removes most water. A settling zone then stabilizes the part and local air before the trigger.
An earlier knife can reduce carryover but cannot prepare the part if another rinse wets it again. A knife too close to the camera sends mist toward optics and images the part before it settles. Place it after the last wet stage and far enough upstream for stable imaging.
QXY’s LCD cleaning-line guidance follows this logic: air knives sit at the final-rinse exit for drying and particle blow-off before inspection. Match the final layout to part geometry, movement, and inspection task.
For many blower-driven QXY applications, a 20–50 mm knife-to-part distance and a 15°–45° impingement angle are practical starting ranges. Standard slot gaps are commonly 0.5–2 mm, with working pressure around 2–6 psi (0.14–0.42 bar). These values start a trial; they do not define camera readiness.
Angle the jet toward a free edge and in a direction that supports conveyor travel. Use the lowest stable setting that clears the required surface without moving the part or producing excessive mist. Do not adjust a factory-set slot casually; check the gap across the full knife length and confirm the blower condition.
Coverage must include the full inspected width. QXY aluminum alloy air knives are factory calibrated for airflow uniformity of ±5% across the knife length. Standard lengths include 150, 300, 450, 600, 800, and 1000 mm, with custom lengths available. Knives over 600 mm normally use dual inlets to support distribution.
Flat, open parts are suited to a slot air knife that sweeps water toward an edge. If vision inspects both faces, upper and lower knives can treat the part in one pass. Check that lower supports do not hold water and release it inside the inspection zone.
Blind holes, threads, seams, and recesses can retain water after the outer face is clear. Reorient the part, index or rotate the fixture, add another air direction, or use focused air for the critical feature. A tornado air knife can help on complex 3D surfaces. The air path must give liquid an exit.
The inspection region matters. Full-part drying may not be required for a simple presence check, but droplets outside the region of interest can still move, drip, or reach the optics. Define whether the acceptance applies to the vision area, critical features, or the entire component.
Build a representative sample set with normal parts, known defects, clean dry references, borderline droplets, and difficult geometries. Lock camera, lens, exposure, lighting, fixture, and inspection recipe before changing the air knife. Otherwise a lighting adjustment can hide a blow-off problem.
• Record false rejects, missed known defects, measurement variation, code read margin, or classification score as appropriate.
• Compare the first part after startup with parts produced after the washer and blower stabilize.
• Test the fastest speed, widest load, edge positions, and worst trapped-water feature.
• Inspect the camera window and lights after an extended run for mist or residue.
• Verify part position and edge stability at the actual trigger point.
A successful handoff is repeatable over time. The air knife should not merely produce one dry-looking sample. It should keep the image response inside the validated inspection window without increasing mist, part movement, air contamination, or rinse carryover.
Bonded oil, dried detergent, tacky residue, and embedded particles need proper cleaning and rinsing. The air knife is not a chemical-cleaning replacement. Static-sensitive plastic or coated parts may also need ionization and local extraction to prevent dust from returning after blow-off.
Deep internal passages may require vacuum drying, heated finishing, part rotation, or a dedicated focused-air circuit. If the camera inspects an internal feature, validate that the feature itself is dry and visible. A dry outer surface does not prove that a cavity is ready for inspection.
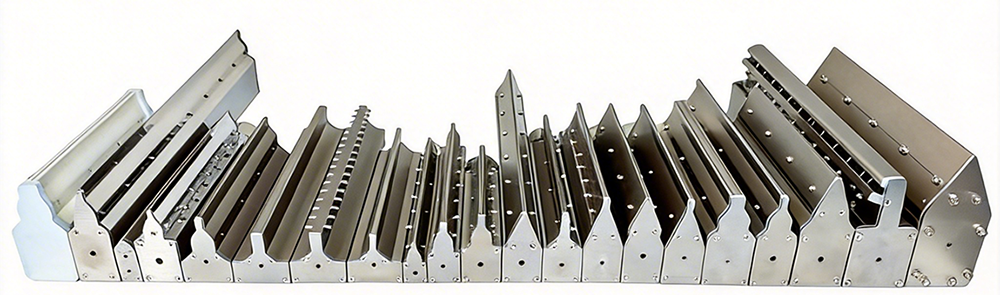
Aluminum alloy air knives suit general dry-off positions with low chemical exposure. Stainless steel or PVC may be better near washdown, cleaner splash, or corrosive process areas, depending on chemistry and temperature. Select all wetted or exposed hardware for the actual environment.
Blower-driven systems are practical for wide, continuous coverage. Compressed air can provide focused impact for holes or small regions, but air quality, consumption, and noise should be evaluated over the production duty cycle. The correct system delivers a stable camera-ready part, not simply the highest air velocity.
QXY Machinery (Shenzhen Qixingyuan Machinery Equipment Co., Ltd.) is a high-tech enterprise integrating R&D, design, production, and sales. Based in Shenzhen, China, the company specializes in industrial drying, dust removal, and water-blowing solutions and has more than 10 years of focused air knife experience.
For aqueous washing and pre-inspection blow-off, relevant QXY products include aluminum alloy slot air knives, stainless steel and PVC designs, tornado air knives, small-hole air knives, and dual-sided configurations. Custom length, slot width, hole pattern, and inlet arrangements are available to match conveyors, part geometry, inspected regions, and washer environments.
A useful application review includes the wash and rinse sequence, final-rinse quality, part and fixture drawings, line speed, trapped-water features, inspection type, camera position, settling distance, air source, runoff and mist control, and the required image-stability endpoint.
Q: Why must parts be dry before machine vision inspection?
A: Droplets and films can change reflection, contrast, edges, codes, and apparent defects. A stable dry condition helps the camera see the part rather than a changing water layer.
Q: Should the air knife be installed immediately before the camera?
A: It should be after the final rinse but far enough upstream for runoff and mist to leave and for the part to settle. Determine the spacing from line speed, part motion, and image stability.
Q: Can an air knife replace the final rinse?
A: No. Rinsing removes wash chemistry. The air knife removes liquid. Blowing detergent solution from the part may reduce carryover, but camera-ready preparation still requires the specified final rinse.
Q: What distance and angle should be tested first?
A: For many blower-driven applications, QXY uses 20–50 mm stand-off and 15°–45° angle as starting ranges. Final settings must clear water without moving the part or coating the optics with mist.
Q: How long should the settling zone be after the air knife?
A: There is no universal length. Set it from conveyor speed, part stiffness, fixture response, exposure time, and measured position or edge stability at the trigger point.
Q: How can lens contamination from blow-off be prevented?
A: Direct runoff to a drain, keep the camera outside the plume, use shedding baffles and extraction where needed, and inspect the optical window after extended production runs.
Q: How should the air knife be validated with the vision system?
A: Use real parts, known defects, difficult wet features, full line speed, and all load positions. Track inspection errors, measurement variation, image score, part stability, and optical contamination over time.
Need a custom air knife solution? Send us your application details, material requirement ,or air source type . Our engineering team will help you select the right model.

Shenzhen Qixingyuan Machinery Equipment Co., LTD.
info@airknifecn.com
Building 8, Wanfeng Third Industrial Zone, Xinqiao Street, Bao'an District, Shenzhen, Guangdong, China


